Ape Cave Lava Tube & Interpretive Site at Mt St Helens in Washington
Ape Caves lava tube is located in the Mt St Helens National Volcanic Monument in Washington state. It’s one of our favourite adventures in Washington and is a must-stop every time we visit Mt St Helens.
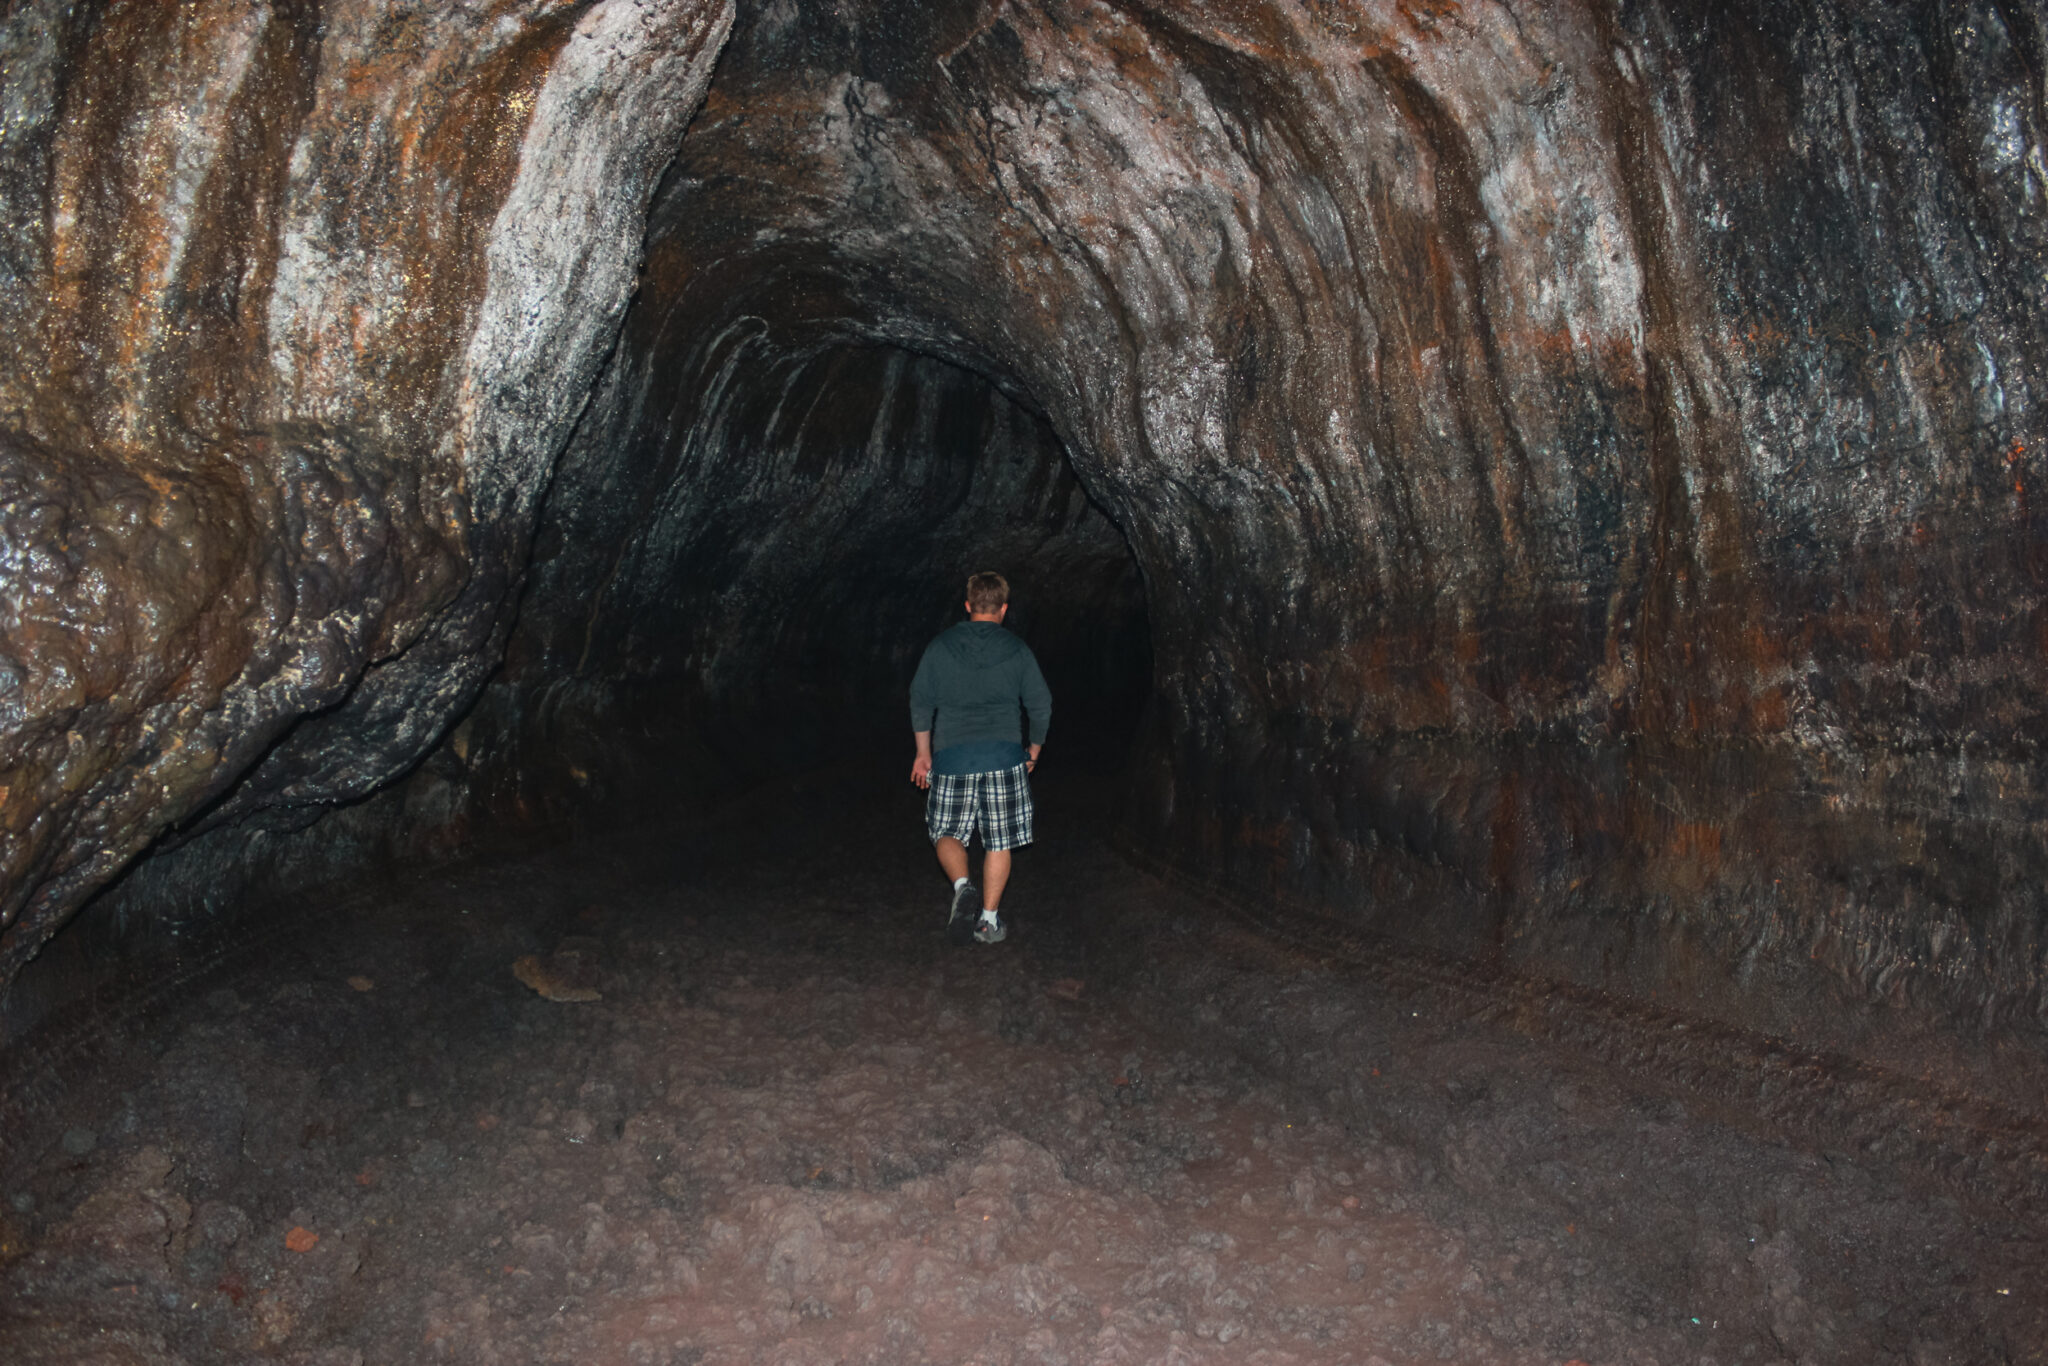
Ape Cave lava tube is 2.5 miles long and is thought to be the longest lava tube on the continental USA (and third in North America). It feels like a tunnel to the center of the earth.
You might also like to check out the Lava Canyon hike or Windy Ridge Viewpoint while you’re at Mt St Helens.

Trail Stats for Ape Cave
- Difficulty: Moderately easy
- Trail Type: Loop
- Length: Lower: 1.5 mi | Upper: 3.1 mi (see map)
- Trailhead: Ape Cave Interpretive Site
- Open Dates: Mid-May to October 31
- Fee: Entry reservation or Northwest Forest Pass
Cost & Reservation
Over the last few years, the pricing for Ape Caves has changed a little bit.
Timed reservations, which cost $2 from recreation.gov (not available on-site), are needed for entry. Each vehicle only needs one ticket. Reservations cover a two hour period.
You also need a parking permit. In the main season, you’ll need the Northwest Forest Pass, which is $5/day or $30/season; you can buy this pass on-site. From December 1 to March 31, you’ll need the Sno-Park Permit (which you’ll need to buy ahead of time because it isn’t available on-site).
You can also rent lanterns in the summer for about $5 from Ape Headquarters.
Open Dates & Parking
Ape Caves used to be open year-round, but since COVID reservations are only available from mid-May to late October.
There’s a large parking lot at Ape Headquarters that has room for buses, RVs, and regular cars. In the summer the parking lot fills up quite quickly, but luckily there’s more parking available along the road.
Temperature in Ape Cave
The temperature inside Ape Cave lava tube rests at about 40°F (5°C) all year long. Water drips from the ceiling, so it’s important to dress for the cool weather even when it’s sweltering above-ground.
You’ll also sometimes experience cold breezes in narrow sections of the cave which can temporarily make it even colder.
Ape Headquarters
The Ape Headquarters is a US Forest Service building near the lava tube’s entrance. In the summer you can rent lanterns, buy souvenirs, and enjoy guided walks from here. Vault toilets and garbage disposal are also available here, but there’s no drinking water.
The Headquarters are closed in the winter. It opens for weekends in May and in mid-June opens seven days a week for the summer.
Directions to Ape Cave
Ape Caves is located to the south of Mt St Helens near the town of Cougar, Washington.
To get here, drive on NF-90 (Lewis River Road) and turn onto NF-83. Stay at NF-83 for 1.7 miles (2.7 km). You’ll begin to see signs for Ape Caves; turn left onto NF-8303 and then travel the final mile to Ape Headquarters and the trail head.
Hiking at Ape Caves
Although there are no stalagmites, stalactites, and crystal clear pools in the lava tube, there are massive boulder piles and a slick lava fall to climb. They’ll test your adventurous side and it’s exhilarating! I’ve been in quite a few lava tubes and caves, and Ape Caves really does offer a unique experience.
Once you’ve gathered your lights, warm clothes, and sturdy shoes, it’s time to start exploring! There are two sections that you can hike: the Upper and Lower Caves. Each offers something unique to explore.
Ape Cave Trailhead
Regardless of which section you choose to explore, you’ll begin your adventure at Ape Headquarters. A fully paved trail leads to the Main Entrance and a staircase brings you to the tunnel floor. The temperature drops quickly.
When you reach the tunnel floor, the tube immediately branches into the Lower and Upper Caves. The Lower Cave, which is the easiest of the two sections, is the most obvious path and continues straight from the ladder.
The Upper Cave, which is much more difficult, is accessed by ducking behind the stairs. It’s very easy to miss, so keep your eyes peeled.
The Lower Ape Caves
The Lower Cave is a great way to ease yourself into exploring the lava tube. It’s an easy 1.5 mile (2.4 km) round trip that you can explore in about an hour. This section is also the best of the two for young kids or seniors.
It’s the most heavily trafficked of the two sections. Even though there are no built-in lights, this section is usually well lit because of the sheer amount of people exploring it.
What to Expect
At the beginning of the hike, the ground is a little uneven but it quickly transitions into a flat, sandy bottom. A mud flow swept through the Lower Cave centuries ago and left behind the sandy floor. The mud flow also blocked the end of the tunnel — if not for that mud flow, the tunnel would be much longer and rockier.
The Lower Cave is home two to impressive formations, the railroad tracks and the Meatball, as well as a tiny chamber. Despite being underground, the lava tube is broad and sweeping. In some sections, the ceiling soars to 30 feet!
I’ve always liked this part of the lava tube, but because it’s the easiest of the two sections you’ll never be alone. Lights flash and voices echo off the walls.
Railroad Tracks
The railroad tracks are a rock formation that runs along the side of the lava tube. It resembles, you guessed it, a railway track.
The formation was created when lava drained from the tunnel and left behind minerals on the wall.
The Meatball
The Meatball is a ball of cooled lava that’s wedged between a narrow section of the lava tube. It’s perhaps the most well-known formation in Ape Caves.
Back when lava flowed through the cave, the Meatball fell from the ceiling and was carried on the lava’s surface before it became wedged and hardened.
When you stand beneath the Meatball, it feels like it’ll fall at any moment! Don’ worry, though, it won’t. It’s been there for centuries. The Meatball is a pretty awesome volcanic formation that’s hard to miss.
Tiny Chamber
A tiny chamber marks the end of the Lower Cave. It’s only large enough to crouch in and has a very sandy floor. However, the airflow is very poor and often smells of ammonia which can be mistaken for urine.
To reach the chamber, you’ll crawl through a tiny tunnel on your stomach. The tunnel is only wide enough for one, maybe two people and isn’t even tall enough to crawl on all fours through. It can be both mentally and physically difficult to navigate, especially if you’re claustrophobic like I am. Luckily, though, you won’t have to crawl for too long.
It’s cool to say you’ve reached the chamber, but there’s not much to actually see. Of three times I’ve visited, I’ve only made it to the final chamber once.
The Upper Ape Cave
The Upper Cave is much more difficult than the Lower Cave. I want to stress that it’s not for everyone. You need to be physically able to climb over multiple large boulder piles and scale a slick, eight-foot tall lava wall in near darkness.
It’s a 1.5 miles (2.4 km) one-way hike and takes about 2.5 hours. The return trail is above ground and is very quick. Even though this section is the same length as the return Lower Cave trail, it takes over double the time to hike. It’s also much less popular and you’ll often explore the dark lava tube by yourself.
What to Expect
The formations in the Upper Cave are quite different than those in the Lower Cave. It’s full of caverns, large boulder piles, and even a slick lava fall.
There are two entrances to the Upper Cave: the Main Entrance and the Upper Entrance. The Main Entrance is the most common entry because it’s also the entrance to the Lower Cave. The Upper Entrance is located up the mountain and is also where the Upper Cave ends. If you start at the Main Entrance, the Upper Cave is accessed by ducking behind the bottom of the staircase. Few people will go this way and it’s easy to miss. You’ll be amazed at how quickly the noise and lights disappear.
When you’re alone, I highly recommend experiencing total darkness. It’s very eerie. You’ll become engulfed in a thick, eerie darkness with no sense of body. Your eyes will search desperately for any light. Even though you’ll stand in the darkness for only a few moments, it’s easy to imagine how people go mad in such stifling conditions.
Caverns
Unlike the Lower Cave, the Upper Cave has a lot of variation in its size.
Some sections are so large you won’t be able to see it all while other places are so narrow that you’ll feel the rock pressing in from every direction. While none of the areas are as small as the final chamber in the Lower Cave, they do require a certain agility to safely navigate.
The biggest cavern, aptly called The Big Room, is an 88-foot wide giant cavern and is located at the beginning of the Upper Cave. The ceiling is so tall you probably won’t see the top!
27 Boulder Piles
There are approximately twenty-seven boulder piles throughout the Upper Cave. You’ll have to climb over every single one and some are easier than others. Even though the piles may look delicate, just remember that they’ve lain that way for hundreds of years.
The rock piles were formed when the volcanic eruption that created the Ape Cave ended and lava drained from the tube.
As the lava cooled, it shrank and cracked. The cracks weakened the walls which caused parts of them to collapse. These collapses formed the large rubble piles and the entrances to the lava tube.
The rock piles are full of sharp lava rock, loose rubble, and large holes. Make sure to watch your step and ensure the rocks are stable before walking on them.
8-Foot Lava Fall
About 0.8 miles (1.3 km) into the hike is the most difficult section of the Upper Cave: an eight-foot lava fall. It appears out of nowhere and looks pretty intimidating. When we came upon it, we thought we’d gone the wrong way (sadly, we don’t have a picture because we were too concerned about climbing the fall).
The lava fall is slick and there’s only one significant foothold to assist in the climb. Sometimes there’s a rope, but it’s quite dangerous to use and the Park Rangers regularly remove it. If you’re not hiking in a large group, you’ll likely need strangers to help boost you up.
At the top of the lava fall, the tunnel quickly siphons you into a tiny passage full of rock formations. It can be awkward to navigate because you’ll need to either climb over or squeeze around them.
Exiting Upper Ape Cave
There are a few more rock piles after the lava fall, but after scaling the lava fall you’ll probably find them pretty easy.
About 1.2 miles (1.9 km) into the hike, there’s a skylight. It’s the first sign of above ground since beginning your adventure. After hiking in the darkness for hours, the light from the skylight is blinding and the foliage is very vibrant. Despite how tempting it is to leave here, exiting at the skylight is neither legal nor safe.
Only a short walk from the skylight is the exit, which is also known as the Upper Entrance. A permanently attached metal ladder quickly and easily brings you to the surface.
Return Trail
When you exit, the light is overwhelming and the heat above ground (especially in the summer) can be stifling. The exit is nothing more than a small hole in the ground that can be hard to notice.
A well-marked path will bring you back to the Main Entrance. You’ll pass beside small lava tubes and sinkholes that are fun to explore. You’ll even enjoy a clear view of Mt St Helens in the distance!
History of Ape Cave Lava Tubes
Mt St Helens is most commonly known for her violent eruption in 1980. However, the volcano has actually been active for roughly 40,000 years. In that time, she’s seen and created a lot of things!
Creation of Ape Cave
About 2,000 years ago, the Ape Caves lava tube was formed. Way back in about 0 CE, fluid lava poured from Mt St Helens’ southern side — similar to the Hawaiian volcanoes today.
When the outer edges of lava cooled, an insulated crust formed which allowed the inner lava to continue flowing. The fast-moving inner lava pulsed through the tunnel for months and slowly created the lava tube we can explore today.
Discovery of Ape Cave in 1947
In 1947, the lava tube was discovered by Lawrence Johnson, a local logger. He noticed a tree growing at a strange angle and found a large sinkhole. The sinkhole opened into a large, dark tunnel where an overhang and echoing cavern lay. He was unable to continue investigating on his own, so he came back with his crew.
However, no one wanted to lower themselves into the dark hole, so Johnson contacted a local spelunker and scout leader, Harry Reese, to investigate.
Reese and his scouts were the first to explore the pristine lava tube in the early 1950’s. They extensively explored the cave yet never found evidence of previous human exploration. Pretty cool, eh?
Why is it called Ape Caves?
You can thank those adventurous scouts for the lava tube’s name! The scouts named the lava tube in honour of their sponsor, the St Helens Apes.
However, there’s some controversy around the name. Some people have reported seeing and encountering Bigfoot roaming the area. They believe the lava tube was named after the large, ape-like creature and not the scouts. Likely story? I’ll let you decide.
Safety
I’d be amiss if I sent you exploring the lava tube without providing some safety info first. I’m all about keeping you safe! In addition to the below tips, it never hurts to bring the ten essentials on your hikes, too.
Flashlights & Lanterns
First things first, there’s no light source in the lava tube. You’re 100% responsible for bringing your own light.
It’s extremely dangerous to explore the cave without proper light because there are many obstacles like boulder piles, low ceilings, and sharp rocks. We recommend having two to three strong light sources per person for maximum safety. And no, your phone’s flashlight doesn’t count.
Lanterns are one of the best light sources available because the volcanic walls don’t adsorb their light well. You can rent them at the Ape Headquarters in the summer for about $5.
Natural Obstacles
There are many large, jagged boulder piles, particularly in the Upper Cave, that fell from the ceiling long ago and they can be quite difficult to navigate.
You absolutely need sturdy footwear. Do not wear sandals. I repeat, don’t wear sandals. A twisted ankle, or worse, could easily make your exploration of the lava tube very unpleasant.
If you’re planning on exploring the Upper Cave, only do it if you’re physically able to navigate large piles of fallen boulders with little light. This is an important time to be real with yourself about your hiking abilities and to choose a trail that’s right for you.
Respecting the Lava Tube
As you explore Ape Caves, remember to help protect it by being a respectful visitor. By doing our part, the cave will stay beautiful for years to come and future generations will be able to explore it.
Cave Slime
The lava tube is home to many living creatures, most of which are too small to see. The cave walls are covered in a white algae that’s commonly known as “cave slime”. This slime is extremely important to the cave’s health because it feeds small animals.
However, when you touch the algea it dies and takes many years to regrow. Unfortunately, people have written on the walls which has killed a lot of the fragile organism. When you’re in the lava tube, try very hard to not touch the walls.
White-Nose Syndrome & Bats
Small-eared bats also live in the lava tube. They rarely bother visitors, but they’re very susceptible to disease people may carry. The most devastating disease is white-nose syndrome because it’s lethal to them. As of April 2016, the disease has killed 6 million small-eared bats in Canada and the USA.
Ape Cave is currently free of the disease, but when a cave becomes infected it spreads like wildfire. If one bat is infected, within two years about 90% of its colony will be dead. Because of this, Park Rangers work relentlessly in the summer to educate visitors.
Protecting the small-eared bats is an ongoing process, but one of the easiest things you can do is ensure you don’t wear clothes in the lava tube that you’ve worn in other caves. To learn more about white-nose syndrome and what you can do, check out WhiteNoseSyndrome.org.
Leave No Trace
When you hike the lava tube, it’s important to leave no sign that you were there. Remember to bring only yourself, warm clothes, and lights. Always leave your food, drinks, e-cigs, and pets at home; smoking, fires, rock collecting, and littering is prohibited. You can learn more about leave no trace practices in hiking etiquette article.
As the old saying goes, “take nothing but pictures, leave nothing but footprints, kill nothing but time”.
Gear Suggestions
Ape Cave is a rugged natural lava tube. It’s had little human interference over the years and because of this, it’s important to be prepared.
The most important thing to bring on your adventure are two to three strong light sources; we recommend both headlamps and handheld flashlights. Your phone’s flashlight doesn’t count. It’s also always a little chilly inside the lava tube, so warm clothing like base layers, vests, or sweaters are great. I also recommend wearing a backpack with a water reservoir because you’ll want your hands free as much as possible. And last but certainly not least, you need to wear sturdy hiking shoes.